Connecting Ecamm to Switchboard
Looking to produce polished, TV-quality broadcasts from your Mac and distribute them reliably to your entire audience? Ecamm is a powerful, user-friendly production studio that integrates natively with Switchboard Live. By connecting these two tools, your team can easily add custom graphics, lower-thirds, and guest interviews in Ecamm, and securely multistream that feed to all your social destinations via Switchboard. This guide will walk you through the one-time setup process, the two-step 'Go Live' sequence, and the quick workflow for your daily broadcasts.
Last updated 2 months ago

Phase 1: Connect Ecamm to Switchboard
This is a one-time setup. Once authorized, Ecamm will remember your Switchboard account for all future broadcasts.
Open the Ecamm application on your Mac. (Optional: Set up your broadcast canvas by adding any background images, graphics, or camera sources first).
In the bottom right corner of Ecamm, click New to create a new broadcast.
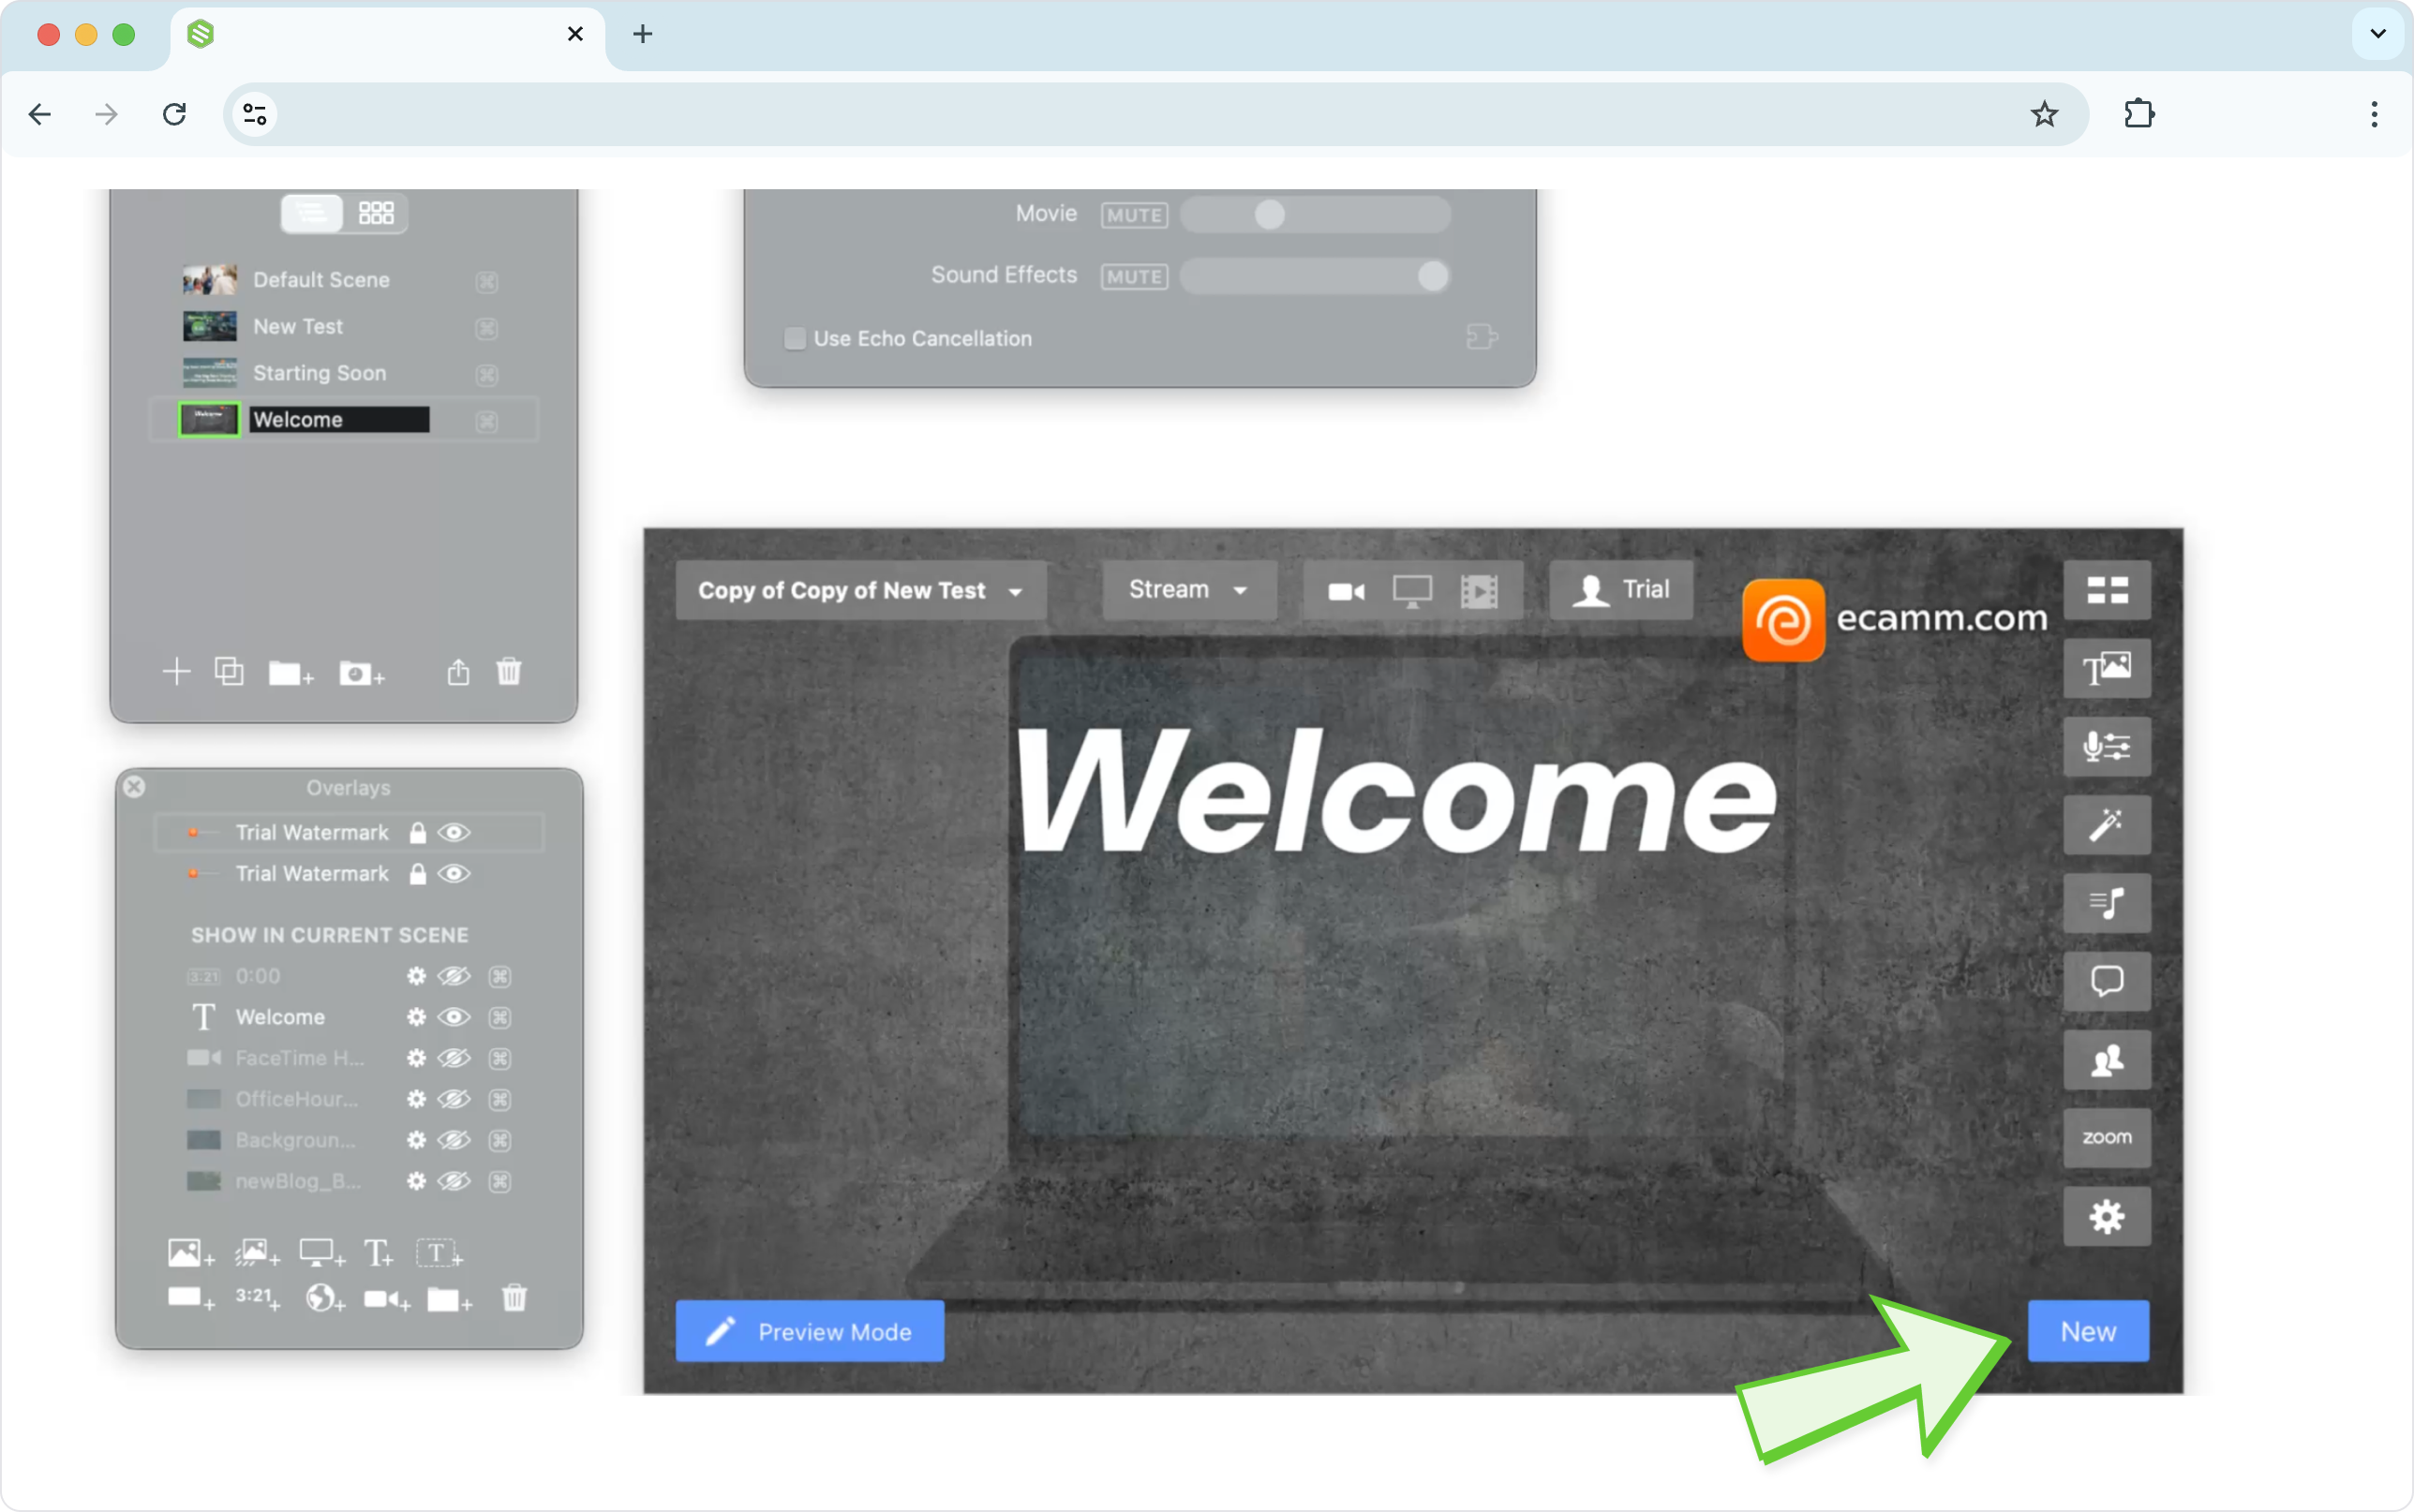
Select Switchboard.

A window will prompt you to log in to your Switchboard account. Enter your credentials and click Allow to accept the requested permissions.

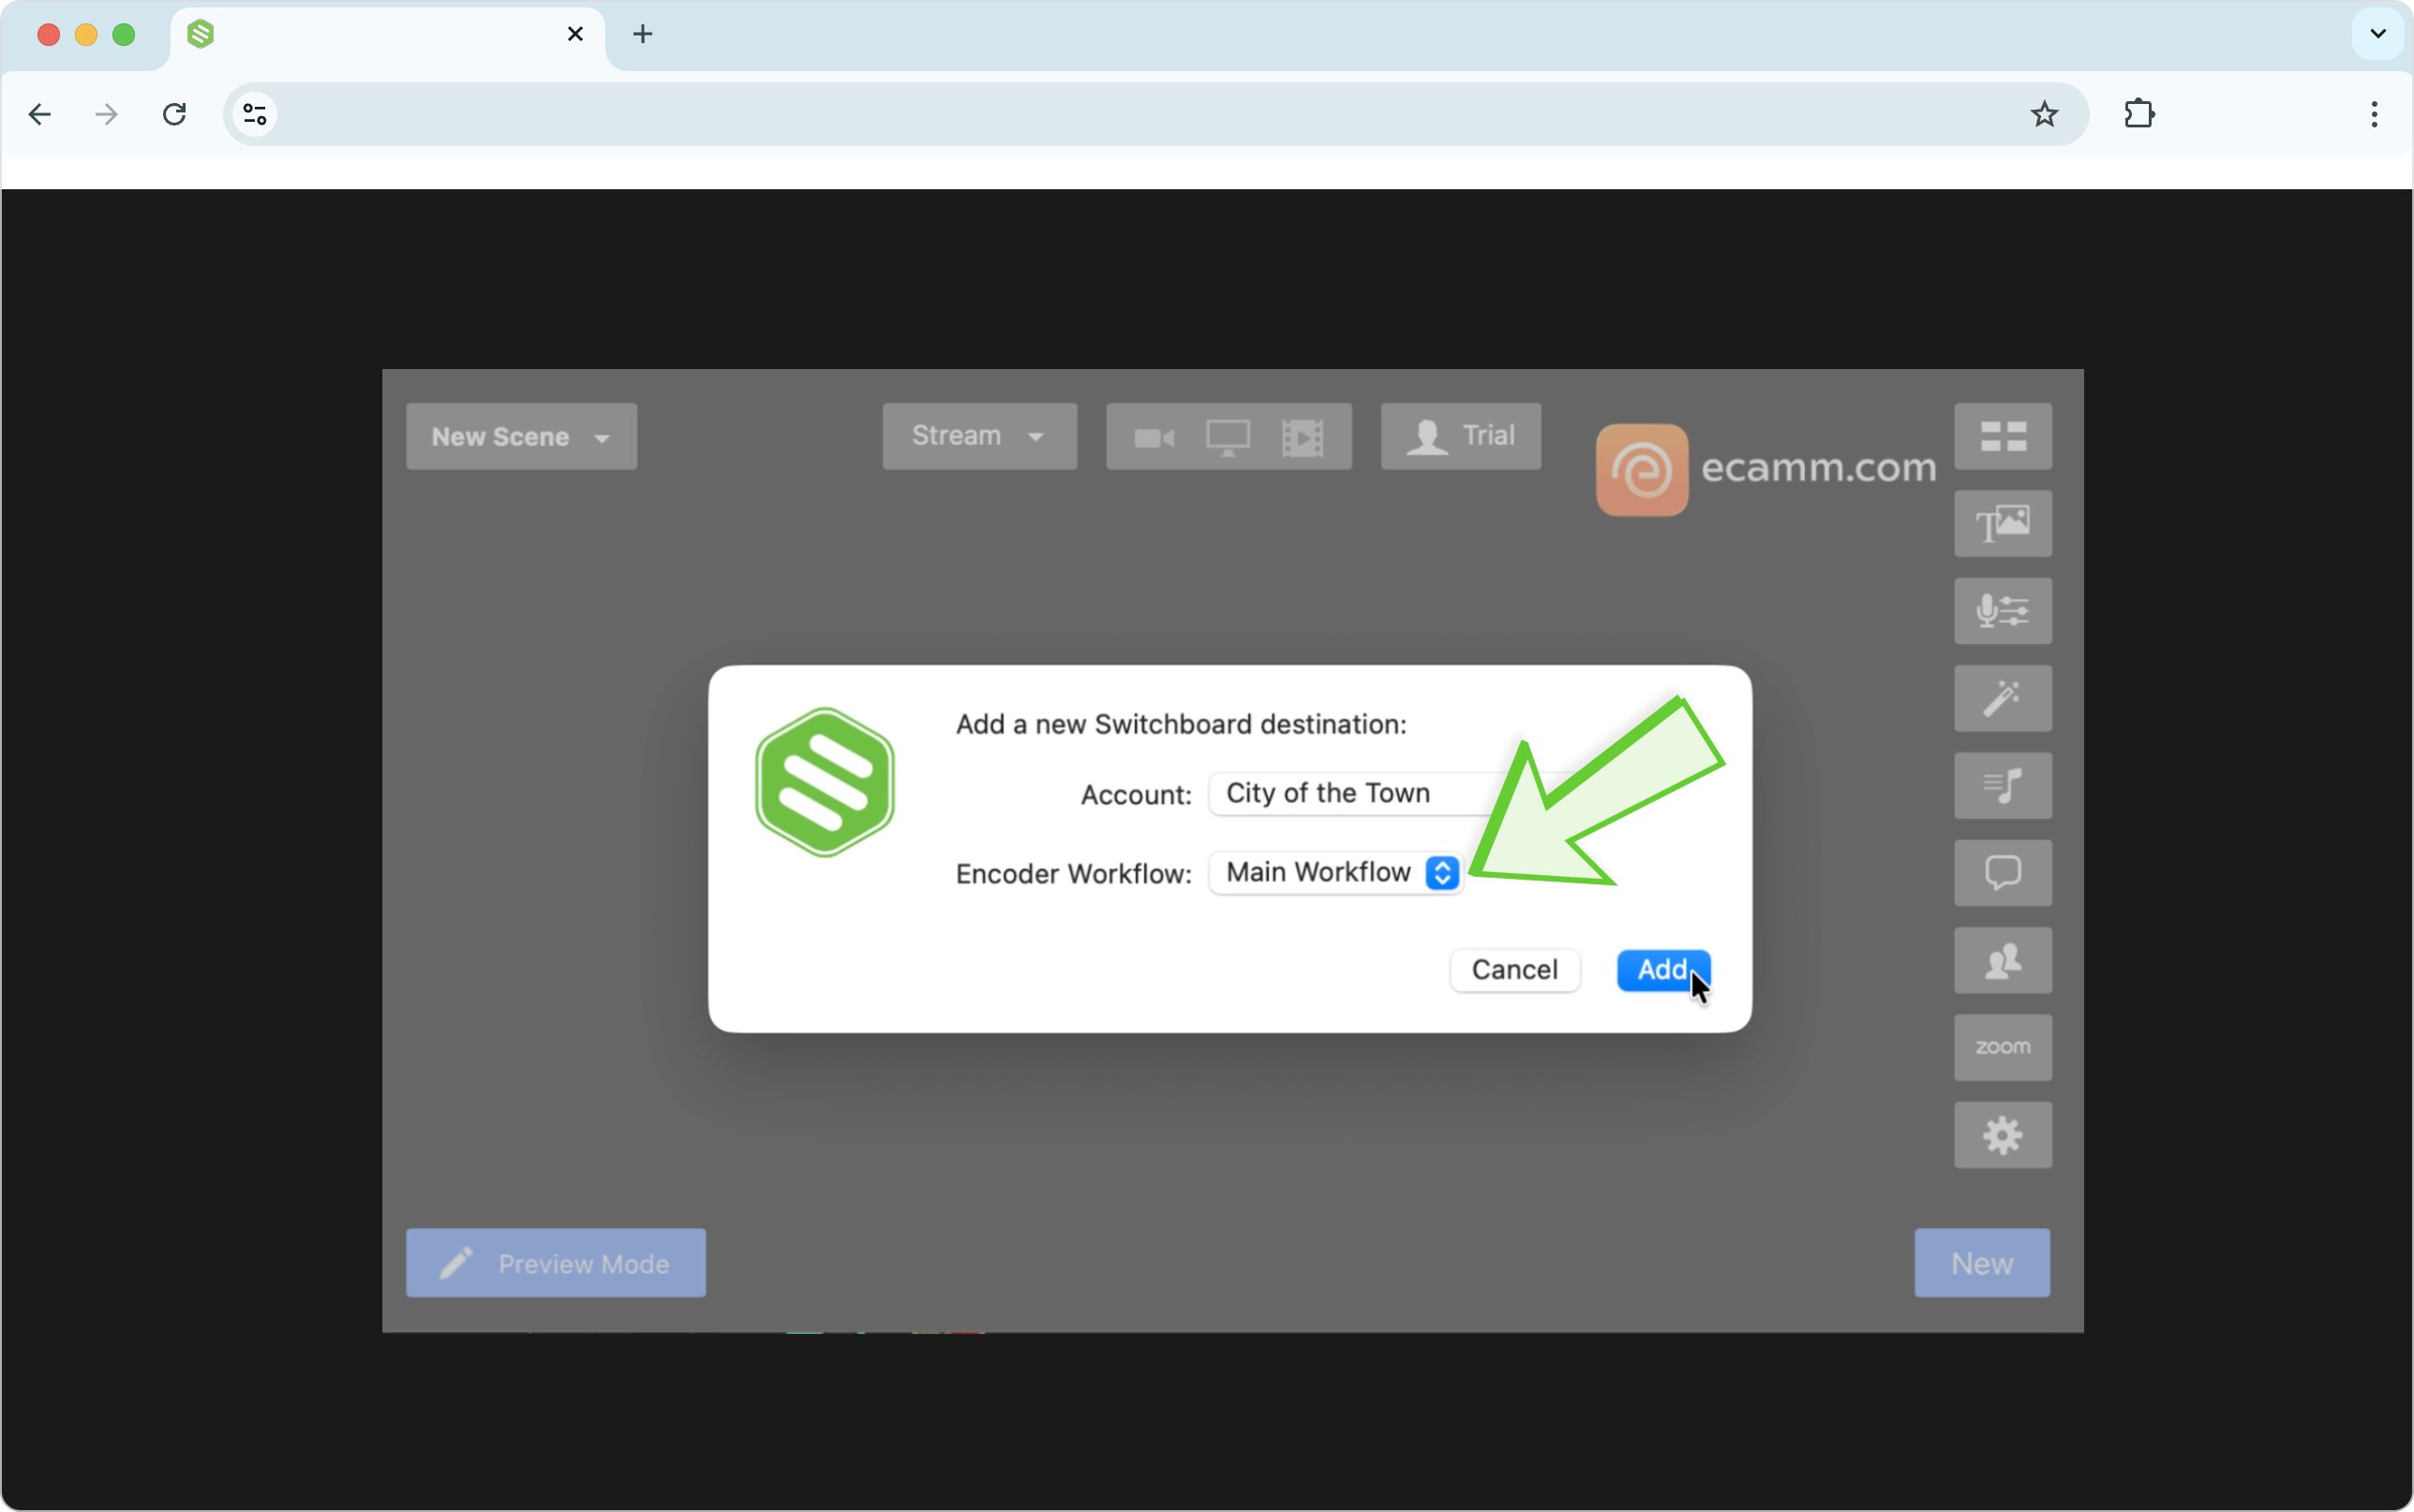
Ecamm will now automatically detect your Switchboard account. If you have multiple Workspaces or Workflows, use the dropdown menu in Ecamm to select the specific workflow you want to stream to. (Note: Workflows are listed alphabetically. If you only have one, it will be selected by default).
Click Add to set this Switchboard workflow as your official Destination.
💡 Pro Tip for Reliability: Run a Speed Test
Before you begin your event, we highly recommend confirming your internet connection is stable. Fortunately, Ecamm has a built-in speed test! In the Destination setup window, simply run the speed test to ensure your network can handle the outgoing video bitrate without buffering.
Phase 2: Send Your Video to Switchboard
Now that the accounts are linked, you need to send your video feed from your Mac into your Switchboard dashboard.
In Ecamm, click the Go Live Now button.

🛑 CRUCIAL NOTE: Clicking this button does NOT put you live on the socials you’ve added in Switchboard Live yet! It is simply establishing the secure connection between Ecamm and your Switchboard account.
Open your web browser and navigate to your Switchboard Live Workflow page.
Look at your confidence monitor. You should now see your Ecamm video playing clearly in the Switchboard preview window!
Phase 3: Broadcast to Your Audience!
Once you confirm your video and audio are coming through cleanly in the Switchboard preview monitor, it is time to go live to the public.
Click the green Start button next to your individual social media destinations, or click the button at the top of your Stream Group to broadcast to all destinations simultaneously.
Within seconds, your polished Ecamm production will be live across your entire network!
⚡ Workflow Hack: Want to skip Phase 3 next time? Enable Switchboard's Auto-Start feature. With Auto-Start turned on, the moment you click "Go Live Now" in Ecamm, Switchboard will automatically push the feed to your social channels!
Phase 4: Going Live "Next Time" (The Quick Workflow)
Because Ecamm remembers your Switchboard authorization, your workflow for all future broadcasts is incredibly fast. The next time you need to stream a city council meeting or community event, simply follow these three steps:
Open Ecamm and click New to start a new broadcast. Your Switchboard workflow will automatically be selected as the Destination.
Click Go Live Now to start sending your video feed to Switchboard.
Open your Switchboard dashboard, check the preview monitor, and click Start to push the broadcast to your social media audience!
(Remember: If you enabled Switchboard's Auto-Start feature, Step 3 happens automatically!)
Frequently Asked Questions
Q: I clicked "Go Live" in Ecamm, why aren't my viewers seeing the video on Facebook?
A: Because of the API integration, clicking "Go Live Now" in Ecamm only sends the video to your private Switchboard preview monitor. You must also click Start Streaming inside your Switchboard account to push the video to your public social media destinations (unless you have the Switchboard Auto-Start feature enabled).
Q: Why don't I see my specific Switchboard Workflow in the Ecamm dropdown menu?
A: Ensure you are logged into the correct Switchboard account and Workspace. Also, verify that the workflow you are looking for is utilizing the SBL Ingest network, as older legacy workflows may not populate in the direct integration menu.
Q: Do I need to copy and paste RTMP Stream Keys to use Ecamm?
A: No! Because Switchboard is a native Destination option inside Ecamm, you simply log in with your email and password. The software handles all of the complex RTMP routing in the background automatically.