How to Add a Facebook Profile, Page or Group as a Custom RTMP in Switchboard Cloud
Last updated About 1 year ago
This article explains how to add a Facebook profile, page, or group as a custom RTMP to your Switchboard Cloud Account.
STEP 1
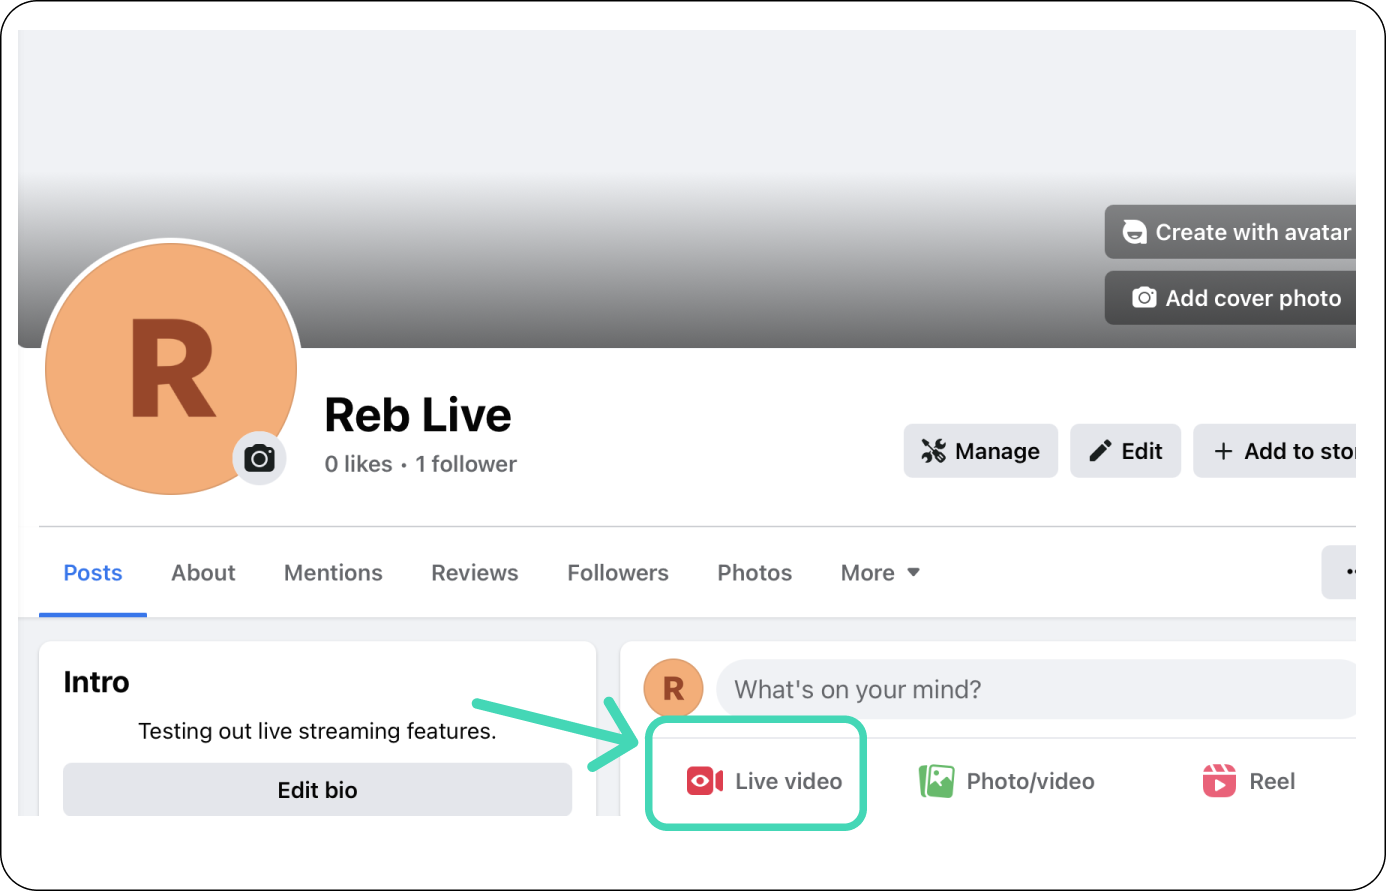
Log into Facebook and open your personal profile, page, or group.
Or use this link: Facebook Live Producer, and select how you want to go live.
In our example, we are logged in as the Facebook Page, so we'll click the "Live Video" Button.
STEP 2
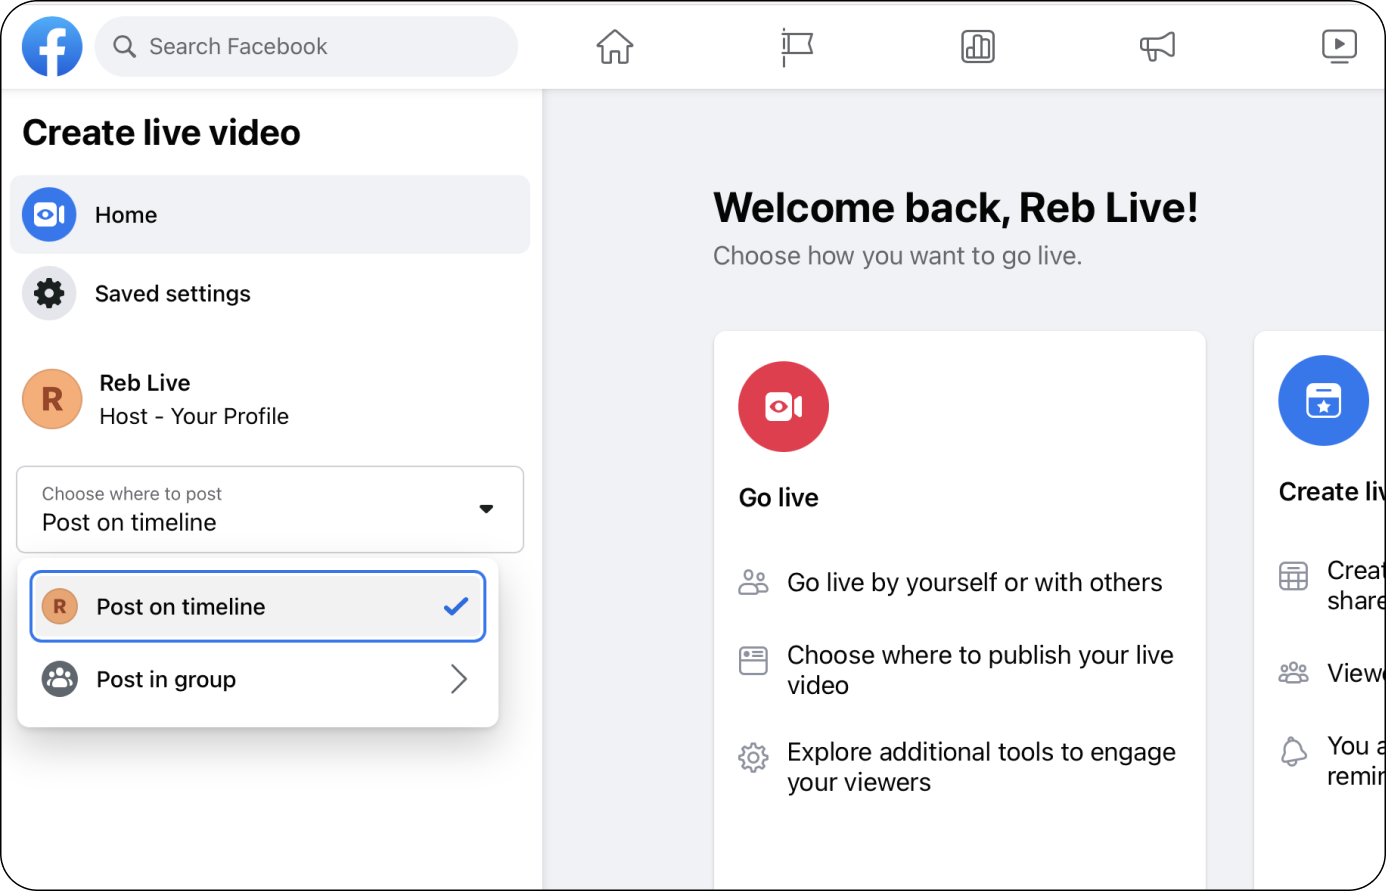
The Create Live Video page will open.
Choose where you want to post (the available options depend on how your Facebook account is set up): Timeline, group, etc.
STEP 3
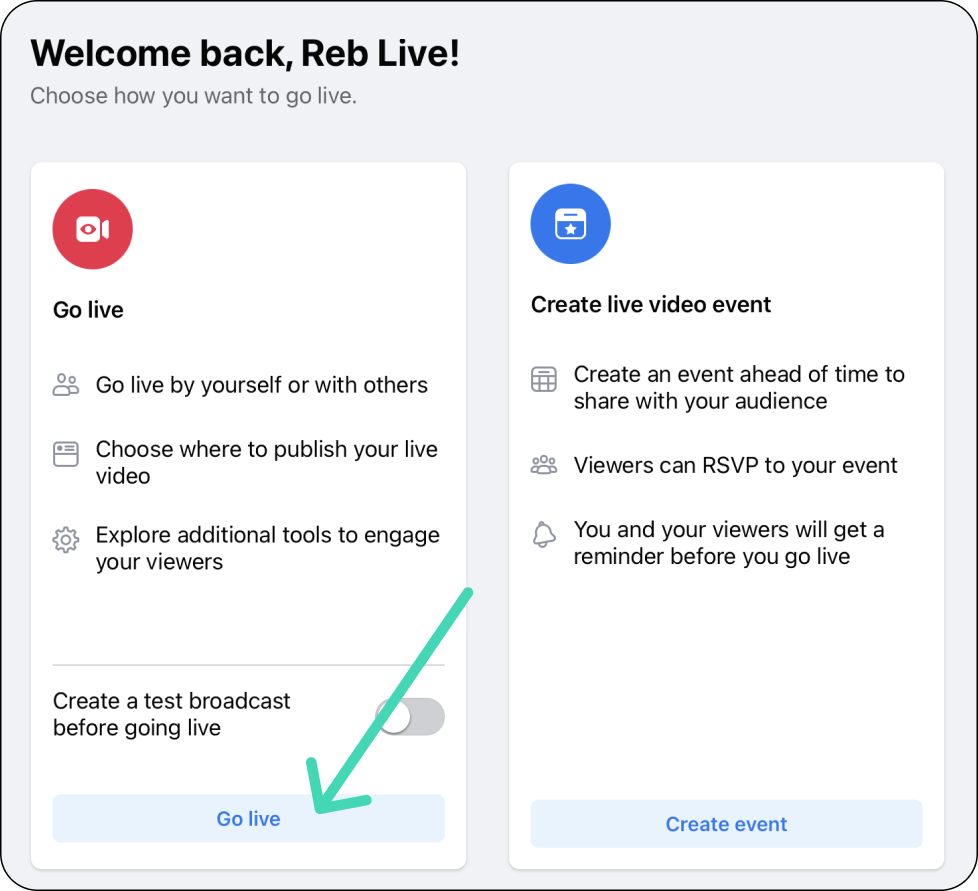
Choose how you want to go live.
Choose the GO Live option for live streams within 24 hours.
A new page will open.
STEP 4
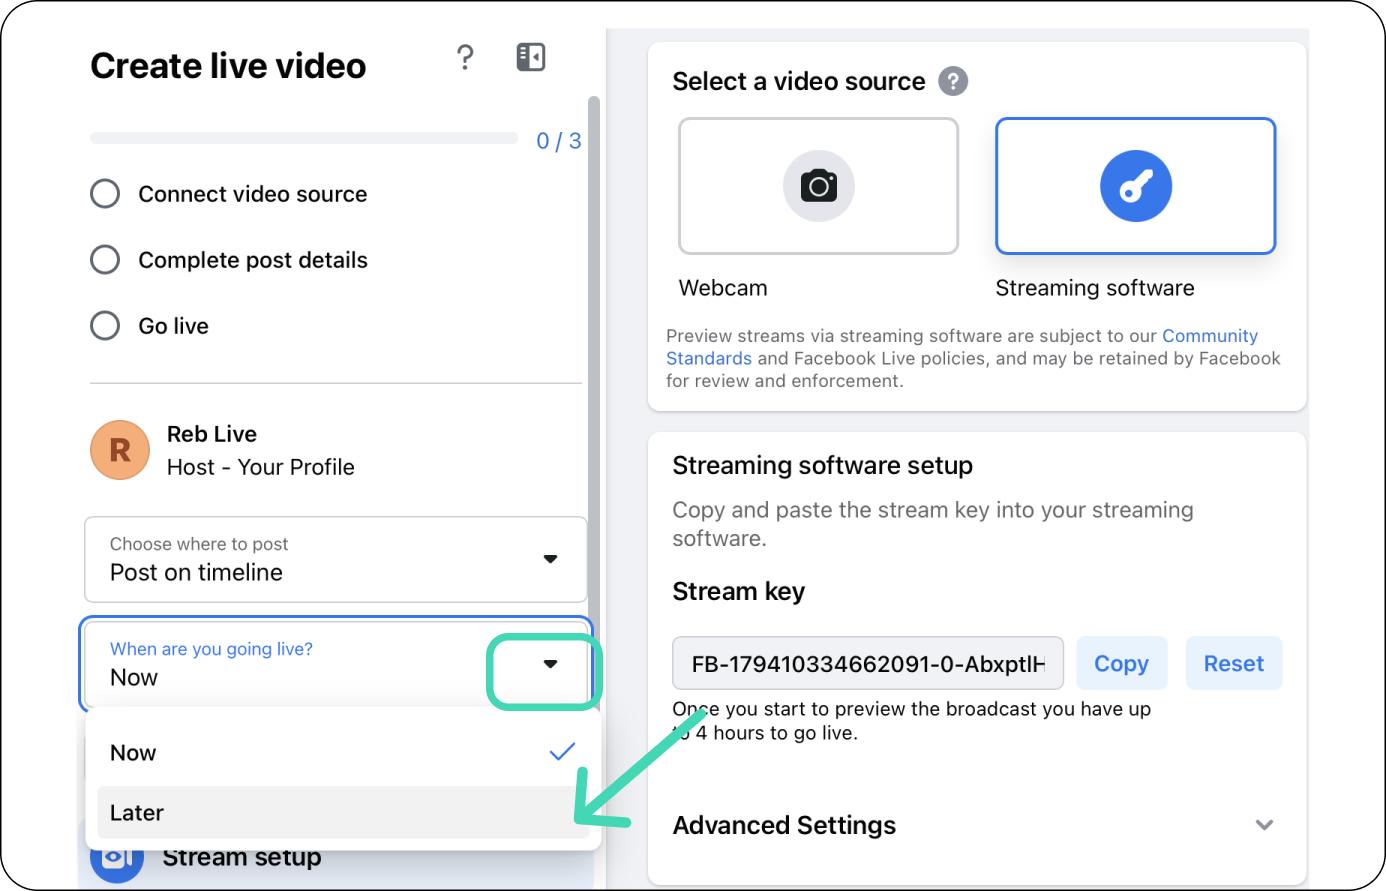
Choose when you're going live
Select "Now" or "Later".
For this example, we chose Later.
Select the Date and Time.

STEP 5
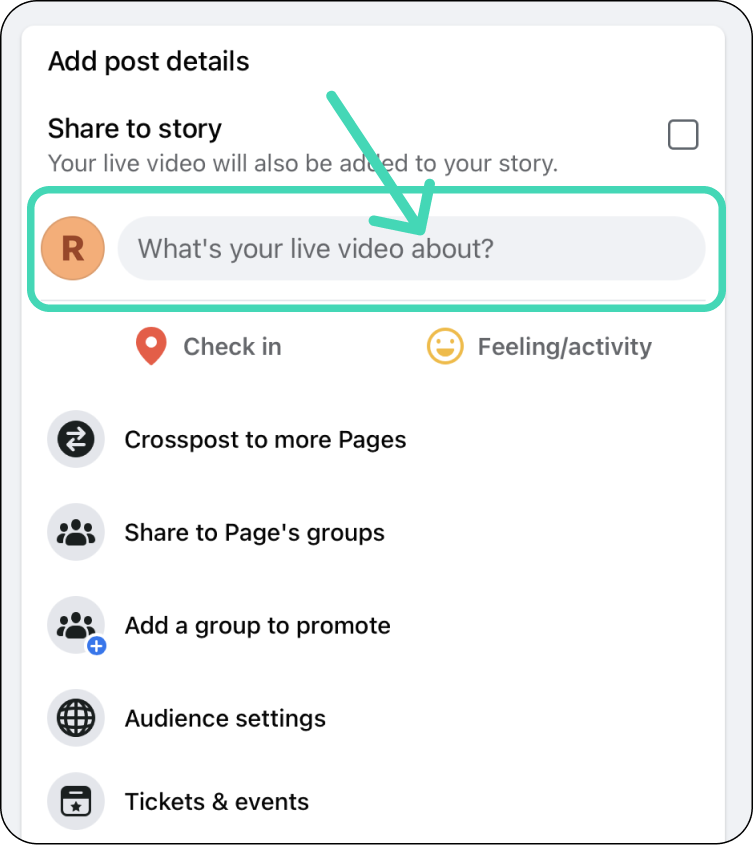
Create Post Details
Click "What's your video about?" to open the stream title and description window.
Provide a title and description for your live stream.
Click Save.

STEP 6
Now that you've provided a stream title and description click the blue "Schedule live Video" button at the bottom left.

STEP 7
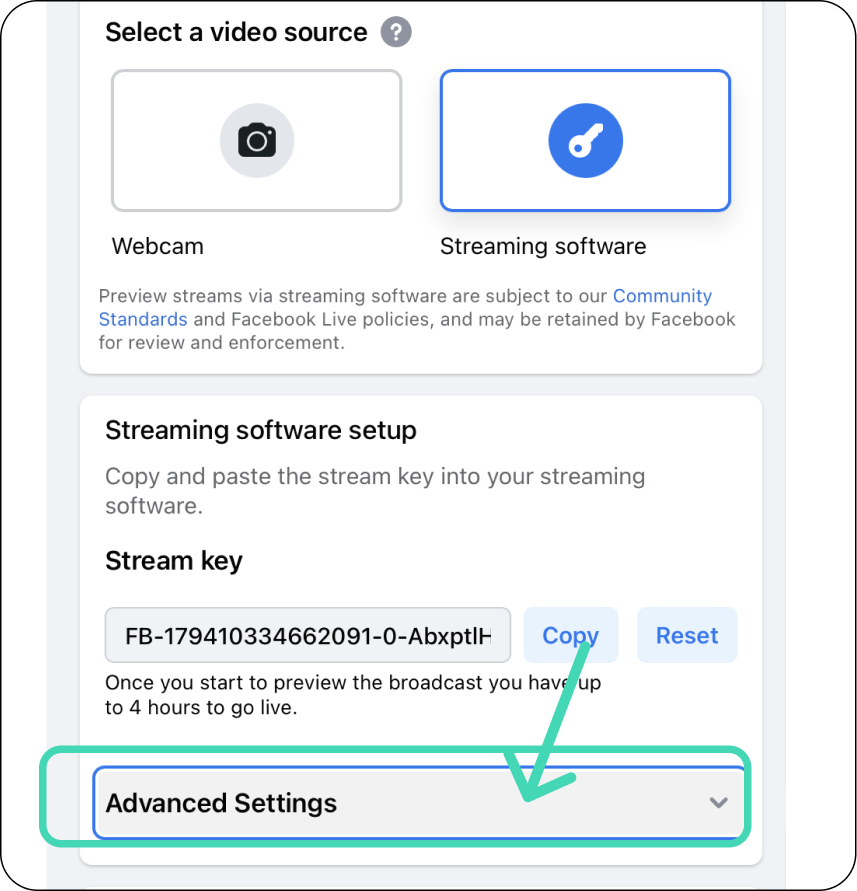
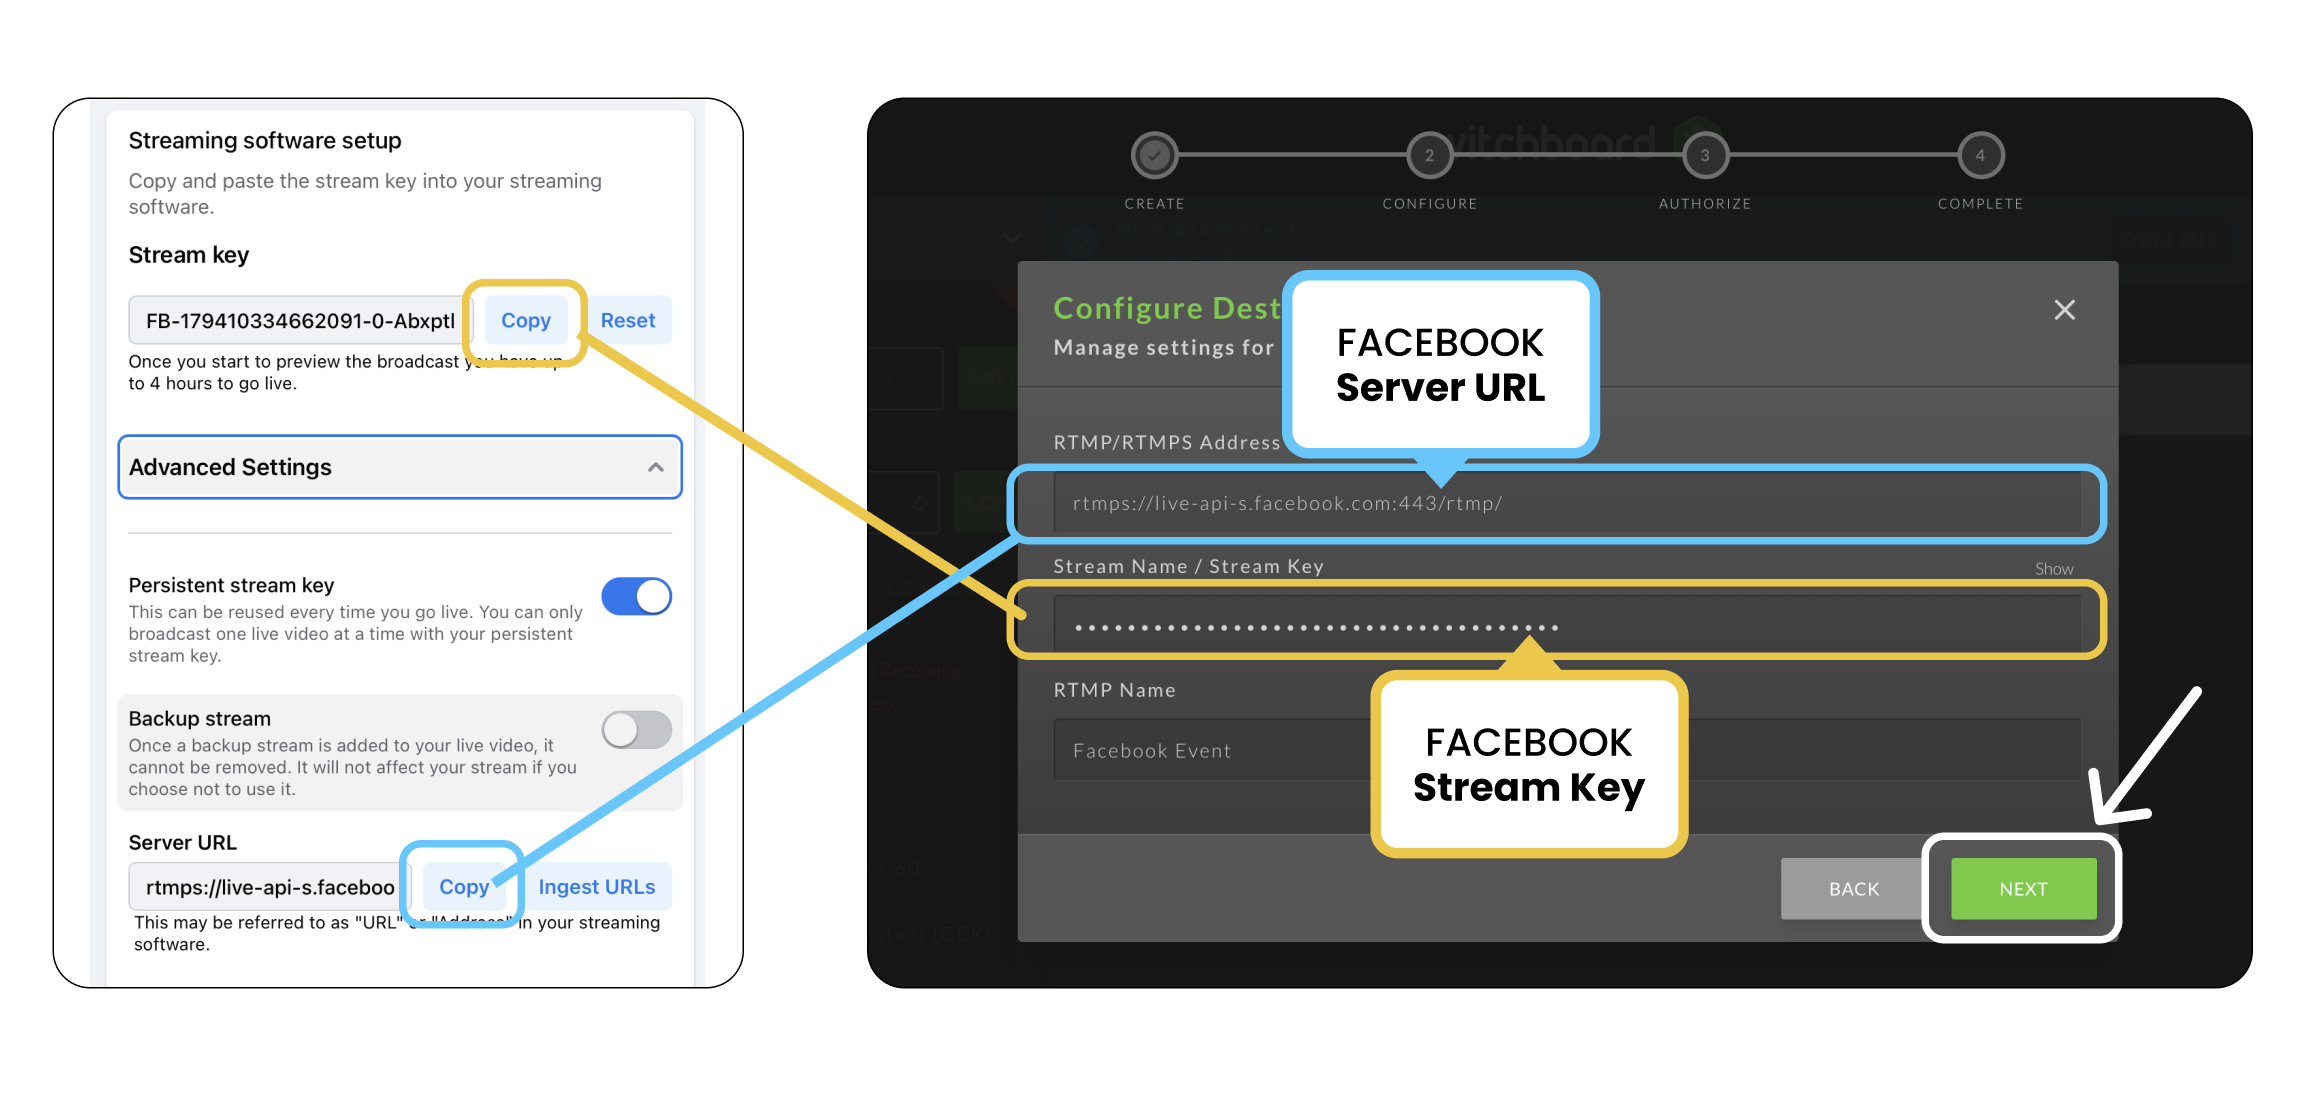
Access the Facebook Server URL and Stream Key
Select Streaming Software as your Video Source.
Open Advance Settings to access the Facebook Server URL.
STEP 8
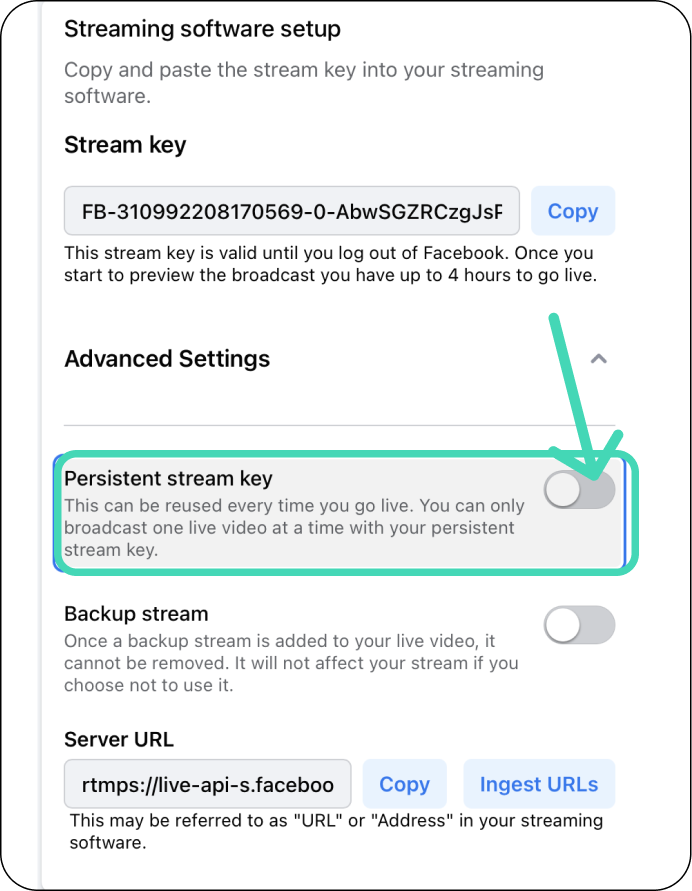
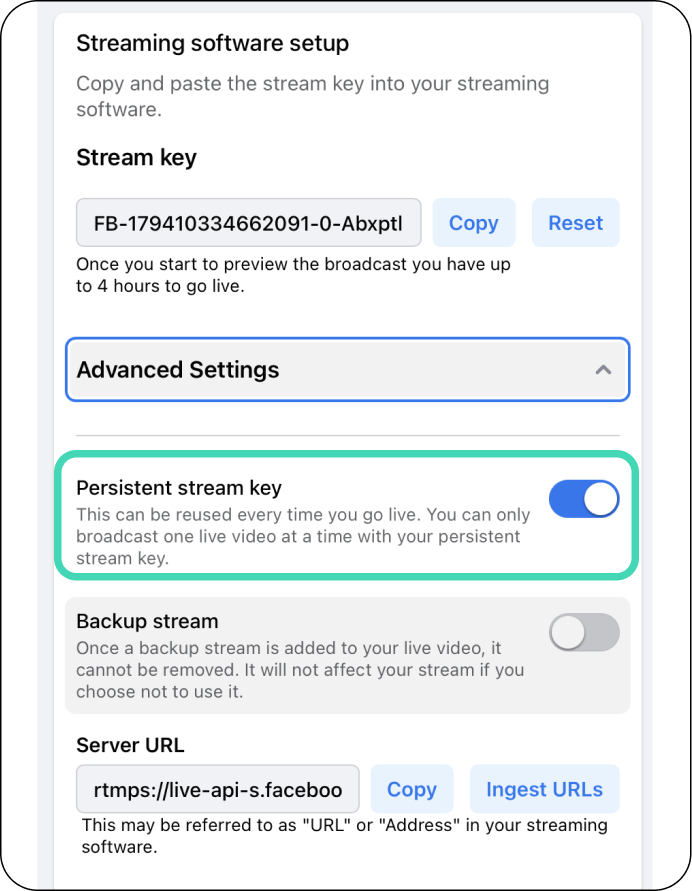
Facebook Stream Key Options
One-time, leave disabled or Persistent Stream key for recurring streams.
STEP 9
Add the Facebook RTMP to Switchboard Cloud
Click the Add Destination Button at the bottom of the Switchboard Group.
Click Connect More.
Select Custom RTMP.
Copy and paste the Facebook URL and Facebook Stream key into the matching fields.
⭐️Note: Ensure you copy and paste the Facebook RTMP info into the correct fields.
Give the Custom RTMP a name so that you'll be able to recognize it later.
TIP: Give it the name of the event, Facebook Page, or Group.
✅ The Facebook destination has been added to your Switchboard workflow as an RTMP.
STEP 10
Test the configuration between Switchboard and Facebook destination.
Start sending the signal from your live streaming software to Switchboard.
Press Go Live next to the Facebook RTMP destination you just added to your destination group.
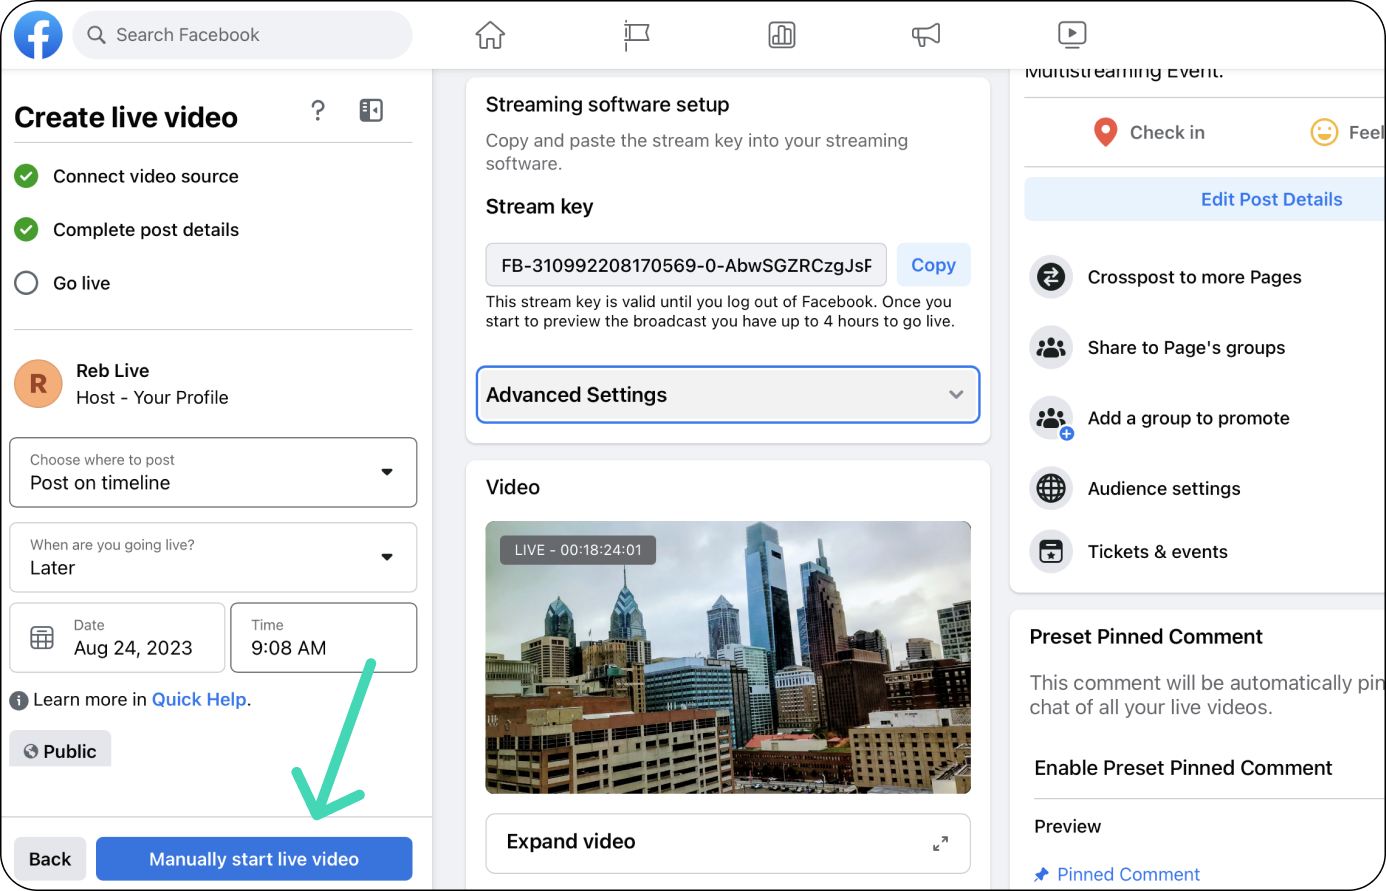
Successful configuration: The video should be displayed in the Facebook preview window.
Note: You can press Manually Start Live Video if you want to override the scheduled time and go live immediately.
STEP 11
Go Live
When you are ready to Go Live.
Start sending the signal from your live streaming software to Switchboard.
Press Go Live next to the destinations, including the Facebook Destination.
The video should be displayed in the Facebook preview window.
Note: Facebook will publish the video at the scheduled start time if you've started sending the live video ahead of the scheduled start time.
HAPPY MULTISTREAMING!