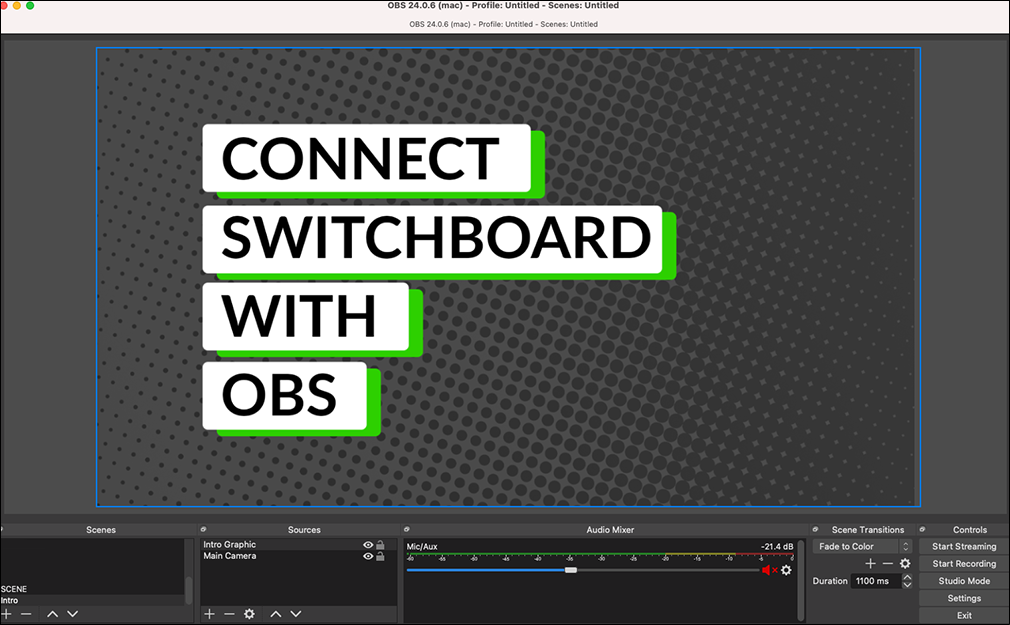
Connecting Open Broadcaster Software (OBS) to Switchboard
Looking to elevate your live broadcasts with custom graphics, lower-thirds, or multi-camera setups? Open Broadcaster Software (OBS Studio) is a free, powerful production tool that pairs perfectly with Switchboard Live. By connecting OBS to your Switchboard workflow, you can produce a professional-grade broadcast and reliably multistream it to all your social media channels simultaneously. Whether you are a technical director or a beginner volunteer, this step-by-step guide will show you how to securely connect OBS, configure the optimal video settings, and build your first broadcast scene
Last updated 12 days ago
You need to have OBS and your Switchboard account open. Connecting Switchboard with OBS is very easy; you’ll simply copy and paste the stream url and stream key from your Switchboard account into OBS stream settings. When you’re ready to go live, simply start sending the live video feed from OBS > Switchboard → Multiple Social Media platforms simultaneously.
Part 1: Connect OBS with your Switchboard Account
Click here to DOWNLOAD OBS.
Open the OBS settings, located at the bottom right.
Choose Settings.

Select Stream.
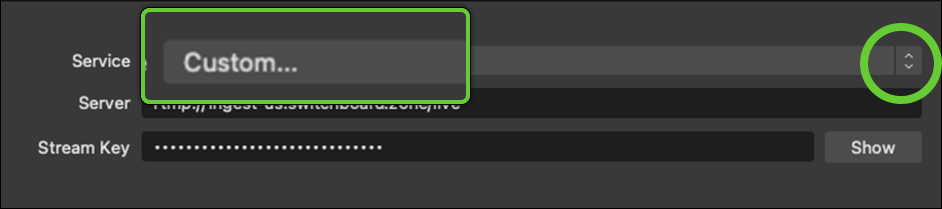
Very important step: Change the stream Service to Custom.
Press the down arrow and choose Custom.

Next, you will go back and forth between Switchboard and OBS.
Grab the Stream URL and Stream Key from the Switchboard Workflow.
Paste the information into the corresponding fields in OBS.
Press Apply.

Part 2: Configure OBS output settings
Many social media platforms have live streaming requirements you’ll need to meet in order to successfully deliver your live stream video to them. We’ll cover general livestreaming settings in this section.
Choose Output from the left side menu.

Change the setting from Simple to Advanced.
Press the down arrow and select Advanced.

Update the stream and bitrate settings.
The following are just generic settings. You may need to make adjustments depending on your internet upload speed and the destinations you're streaming to. Make sure to configure these settings to the recommended settings listed here: CHOOSING THE PROPER BITRATE

Set the Rate Control to CBR.
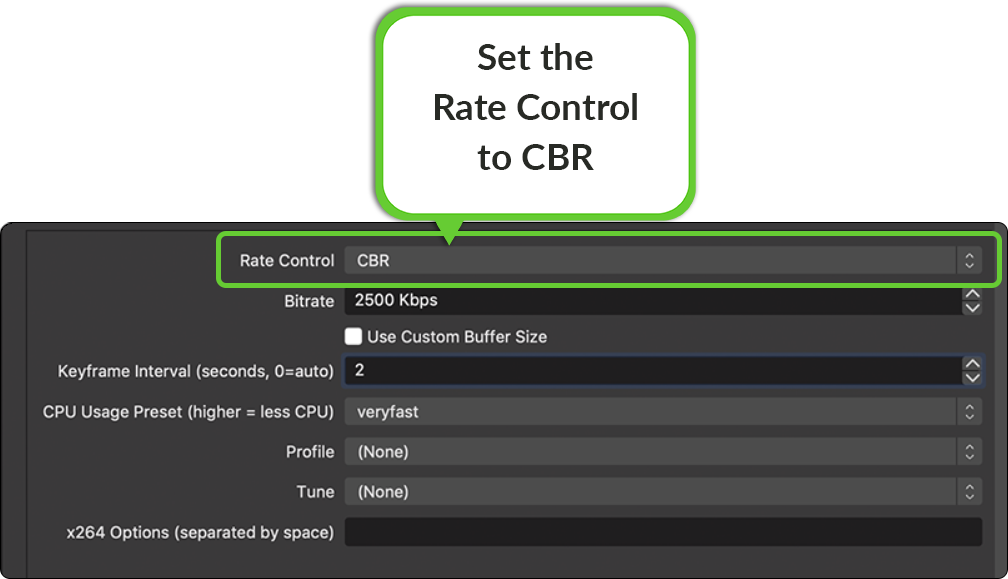
Adjust the bitrate. We recommend setting this value based on your individual live streaming needs.

Set the Key Frame Interval to 2.

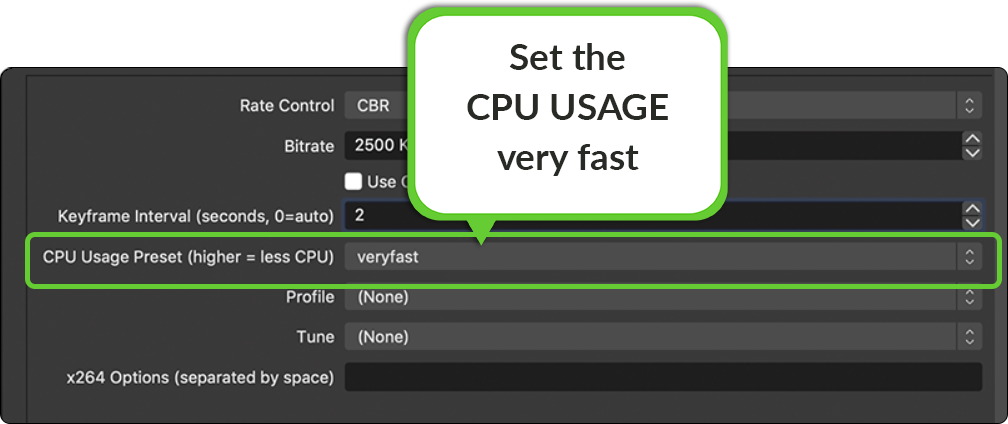
Set the CPU usage to veryfast.
Now that you've configured your stream settings.
Press Apply, then Okay, to return to the OBS preview.
Part 3: Create Scenes and Sources in OBS
Your OBS broadcast consists of Scenes. Just like a real movie, a Scene is comprised of different parts called Sources. There are a variety of sources to choose from. This includes images, audio, pre-recorded video, camera input, browser windows, desktop, etc. Please refer to the OBS sources and Guide for additional information.
Add Scenes
Create a Scene by clicking on the plus sign.
Name the Scene. Press the OK button.


Add Sources

Bring in sources for the scene that you’ve just created.
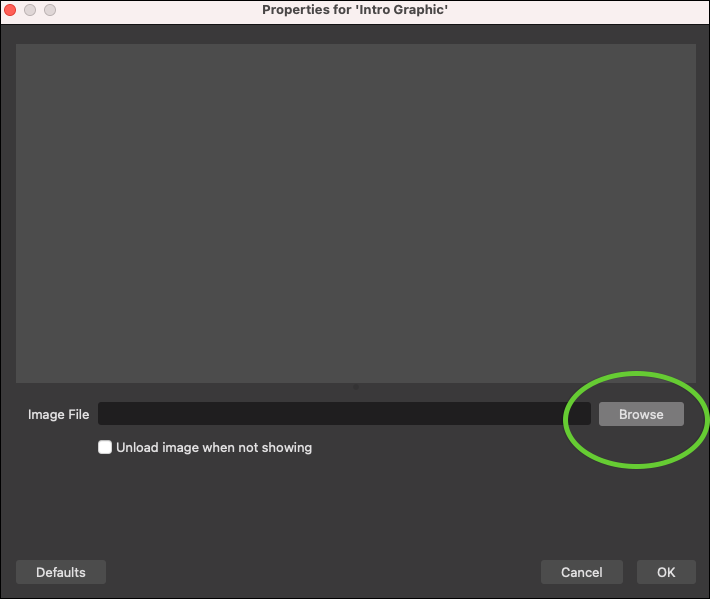
Press the "plus sign" and choose the type of source that you wish to add to the scene.

Choose Image for static images.

Adjusting the Sources
Click on the red bounding box to adjust the resolution and size of the source that you've just added.

Click the eyeball to change the source's visibility.
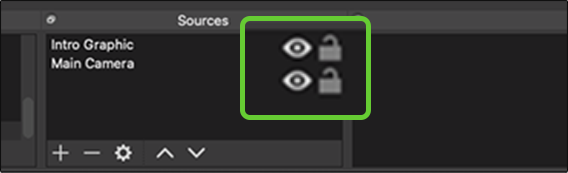

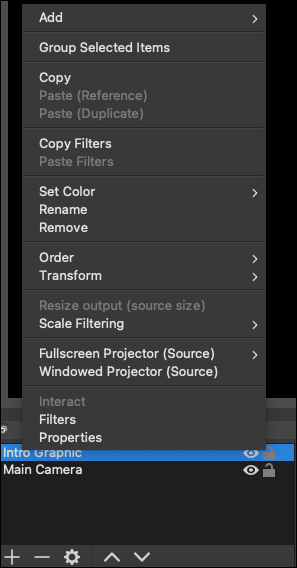
Right-click on the source to open additional options.
Choose a Media Source to bring in a pre-recorded video.

Check the box if you want the video to play on a repeat loop.

Choose a Video Capture Device for a camera. This can be the built-in camera on your computer, an external camera, or a phone connected to your computer.
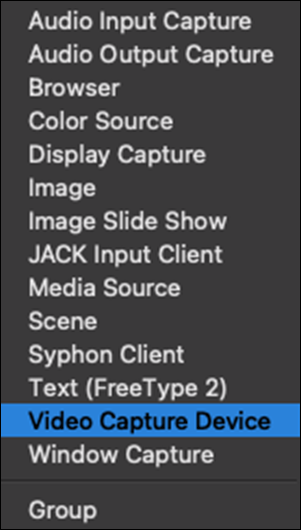
Press the down arrow. A pop-up window will allow you to choose the specific camera that you want.


Adjust the audio so that it is in the green section by moving the slider to the left.

Congratulations! You've successfully connected OBS with your Switchboard Account.
Part 4: Ready to Go Live!
Now that you’ve set up OBS with scenes and connected it with Switchboard, you are ready to GO LIVE and start multistreaming.
In OBS, Press the Start Streaming button.

The video will begin to display on the Switchboard confidence monitor.
You may need to press the white play button to see the video display.
Press Start next to the social platforms you want to stream to, or press Group Select to start all destinations in a Stream Group.
Additional Resources:
Add Social Platforms to your Switchboard Account
How to Livestream on a Facebook Page
How to Schedule a Livestream in Switchboard Live
How to add stream titles for your live videos